In the present day, digital cameras and smartphones have become the predominant tools for capturing and preserving cherished moments, eliminating the need for manual annotations of dates and locations on physical photographs. These modern devices automatically embed descriptive information known as "EXIF data" into the digital image files we capture, including details like the date, time, geographic location, and camera settings used during the image capture process.
While EXIF data serves the purpose of organizing and managing digital photo collections, it can also raise privacy concerns. This data can be easily accessed and extracted from images using various software tools available online, and it can be removed if necessary to safeguard privacy.
If you're interested in delving deeper into EXIF data, including how to access, extract, or remove it, this article will provide comprehensive explanations.
What is image metadata and how can it be removed?
Defining EXIF metadata for images:
The importance of the Exchangeable Image File Format (EXIF) lies in its ability to store a variety of descriptive and vital information related to image files and other media captured by a digital camera. This data provides users with valuable information about the camera used to capture the image, including the camera type, exposure time, shutter speed, metering mode, focal length of the camera lens, aperture, ISO speed, and white balance. Additionally, EXIF data can include details such as the orientation of the image, the date and time it was captured, and even the geographical location where the image was taken. It is worth noting that copyright information can also be added to the EXIF data of the image, enhancing its usability and protection.
- Photo name: The name of the file in which it was saved.
- Date and place of photo capture: The date and time the photo was taken and the geographic location where it was taken (if GPS is enabled).
- Image capture camera: The model of the camera with which the photo was taken.
- Camera settings: Camera settings such as aperture, shutter speed, and ISO.
- Size: Image size (in kilobytes or megabytes).
- Type: File type (such as JPG or PNG).
- Rights: Copyright or intellectual property of the image.
- Keywords: Keywords that describe the content of an image.
- Comments: Any comments added to the photo.
How to access and read EXIF data in photos
EXIF data, embedded within digital images, serves to automatically organize and categorize photos in applications and albums. This hidden information includes precise details about photo capture dates and camera settings, facilitating professional photographers in replicating photo captures with consistent quality and technique. Moreover, EXIF data serves legal and investigative purposes by authenticating photos and identifying fraudulent images.
Accessing EXIF data in photos is straightforward across various devices and platforms. Simply accessing the file properties of the image reveals details such as capture date, time, and camera specifications. In certain instances, specialized software can provide a more comprehensive and professional examination of EXIF information, enabling a deeper comprehension of the data available.
Accessing EXIF Data in Photos on Android and iPhone is a straightforward process.
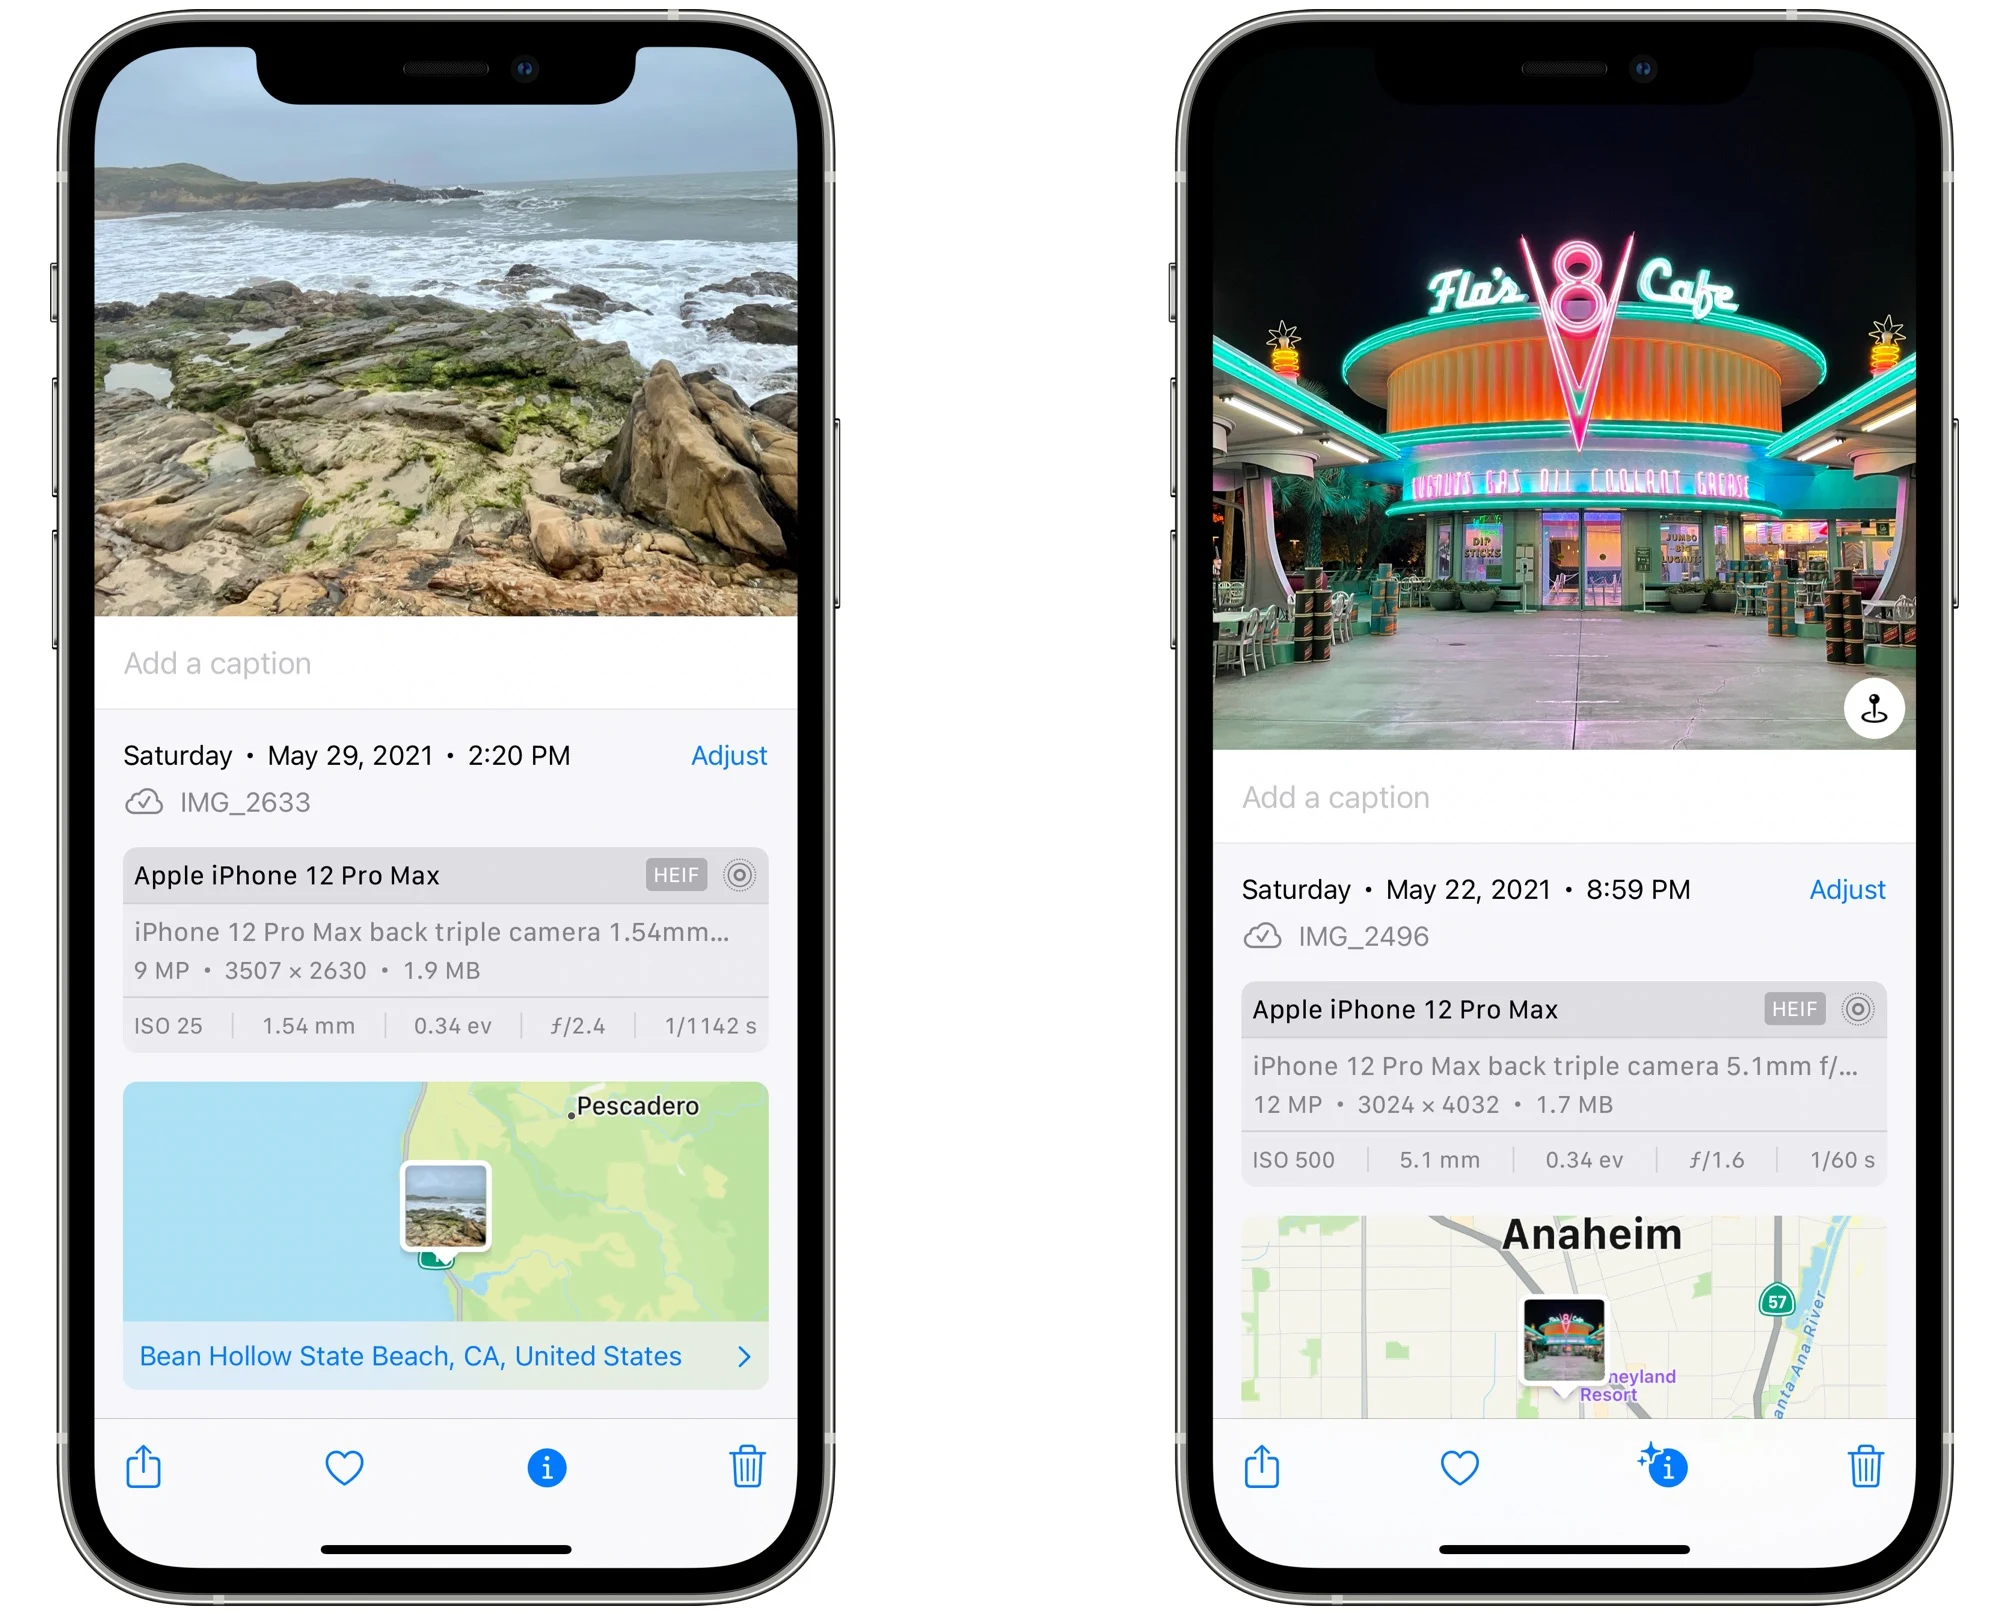
Utilizing the default photo viewer app, users can easily access this information. After opening the photo, a simple upward swipe from the bottom of the screen unveils the details window, showcasing various metadata, including EXIF data. For those using the "Google Photos" app, accessing metadata involves tapping on the desired photo and then selecting either the settings icon or the "i" button at the screen's top. This action reveals a comprehensive range of metadata, including EXIF data, within the "Details" section.
Access EXIF data photos on Windows
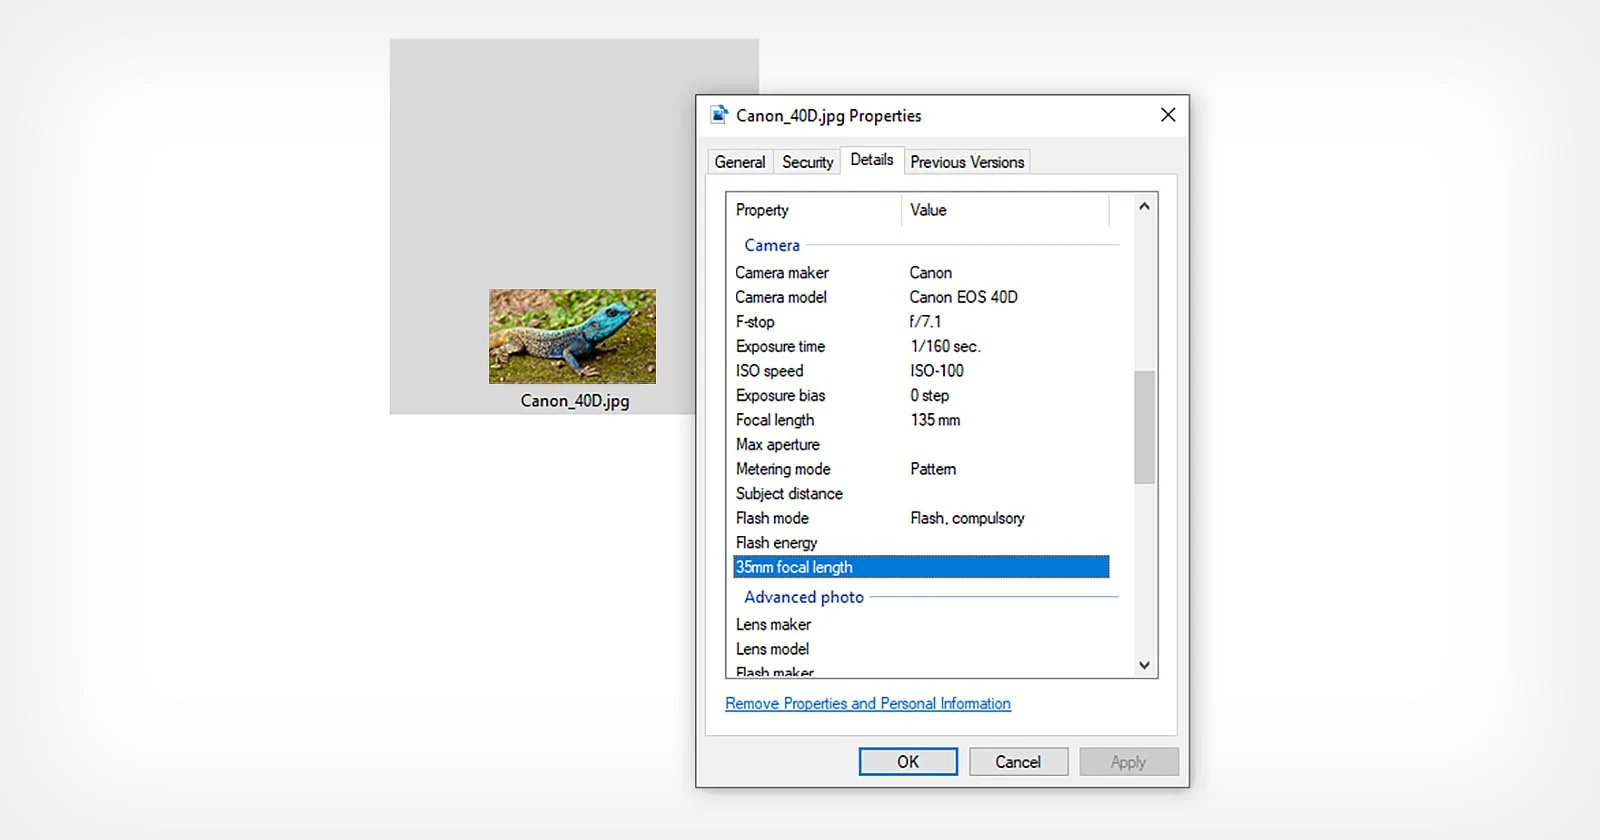
To access the EXIF data of a digital image on Windows computers, we can easily do this by placing the mouse cursor on the image file whose EXIF data we want to view.
- and then press the right mouse button.
- Next, we can select the "Properties" option from the drop-down menu that appears. This action will open the file properties window.
- We have to go to the "Details" section, which contains all the metadata and EXIF data of the image file. Through these simple steps, we can easily access detailed information about the digital images we want to explore.
Access EXIF data photos on Mac
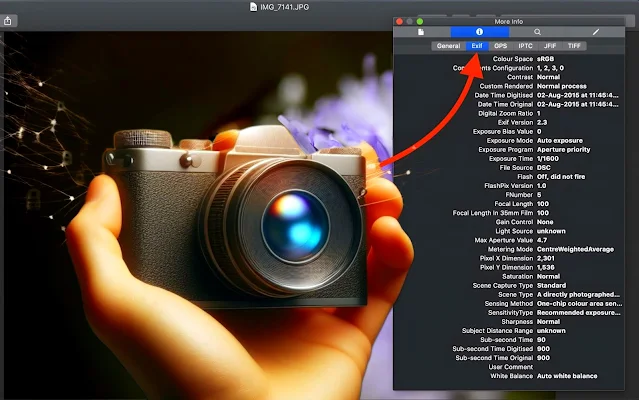
On Macs, EXIF data for any digital image is easily accessible. It is enough to open the photo in the Photos application and press the right mouse button, then select "Get info", or use the shortcut "Command + I" to access information related to the photo directly.
Why do we need to remove EXIF data from photos?
- Protect privacy: Removing EXIF data from photos helps protect your privacy by hiding your personal information.
- Improved security: Removing EXIF data from images reduces your risk of identity theft or fraud.
- Reduce file size: Removing EXIF data from images reduces the file size of the image, making it easier to share and store images.
In our day-to-day interactions, sharing image and media files involves a variety of methods, including peripheral devices, Bluetooth, or email and cloud storage services. These files often carry EXIF data, which may contain sensitive information like geographic details or copyright information that people prefer not to share. Hence, it's essential to remove this data before sharing photos.
Additionally, some professional photographers opt to remove EXIF data from their captured photos for privacy reasons and to safeguard their shooting techniques' secrecy. Although this data isn't visible within the image itself, it remains part of the file, increasing its size. Removing it can be advantageous, as it reduces file size and makes online sharing more convenient.
How to remove metadata from photos
Here are some common ways to remove EXIF data from photos:
- Use photo editing software: Many photo editors offer an option to remove metadata from photos.
- Use image management software: Some image management software offers an option to remove metadata from images when you import or export them.
- Use of websites: There are many websites that offer the service of removing metadata from images for free.
- Use command-line tools: There are command-line tools available to remove metadata from images.
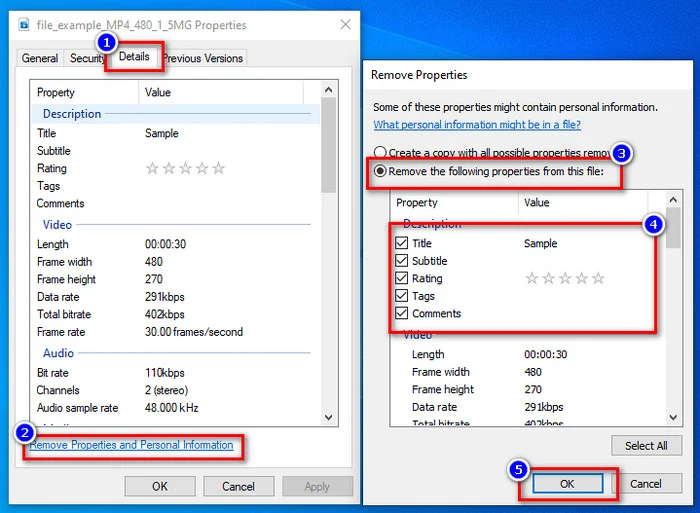
Removing and deleting EXIF data associated with digital images on the Windows operating system is easily achievable. By simply placing the mouse pointer on the image file, right-clicking, and selecting "Properties," a window will open displaying all the details and data specific to the image, including EXIF data.
From here, we can select the data we want to delete, then click "Remove Properties and personal information." Next, we can choose either "create a copy with all possible properties removed" to create a backup copy or "remove the following properties from this file" to delete the data without creating a copy. After selecting the appropriate option, click "Ok" to apply the changes.
Although there are direct methods to edit EXIF data in image files on Windows devices, it is still not possible to edit this data directly on Mac devices or smartphones and tablets. However, Mac users can rely on applications such as:
- Photoshop
- Lightroom
- ImageOptim
- EXIF Purge
To modify or remove EXIF data can be used products.groupdocs.app. For smartphones, this can be achieved using similar apps or by disabling the location access feature in the camera settings. In addition, some photo editors such as Photoshop and Lightroom offer the ability to modify or remove EXIF data completely. Social media platforms such as X, Instagram and Imgur allow users to erase EXIF data before sharing photos.


